Order Management 
On Order Management, view the orders created for the regions, locations, and departments you are assigned to, create new orders, and manage and track the existing ones by using the corresponding options.
View orders, re-orders, and their positions
You can view the created orders, their positions, and details in the following ways:
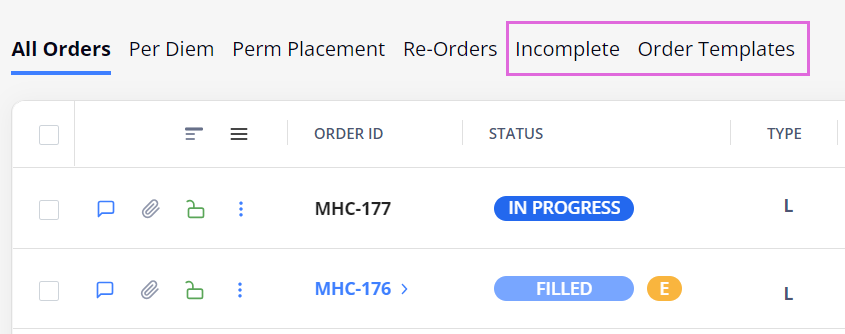
- To find the needed order, go to the order-type-specific tabs (Hide the imageSee the image):
- All Orders: view all the available orders of different types.
- Per Diem: view only Per Diem orders.
- Perm Placement: view only Perm Placement orders.
- Re-Orders: view re-orders separately from their parent Per Diem orders.
For details, go to Order types. - Incomplete: view incomplete orders that were saved for later during the creation.
- Order Templates: view orders that were saved as templates.
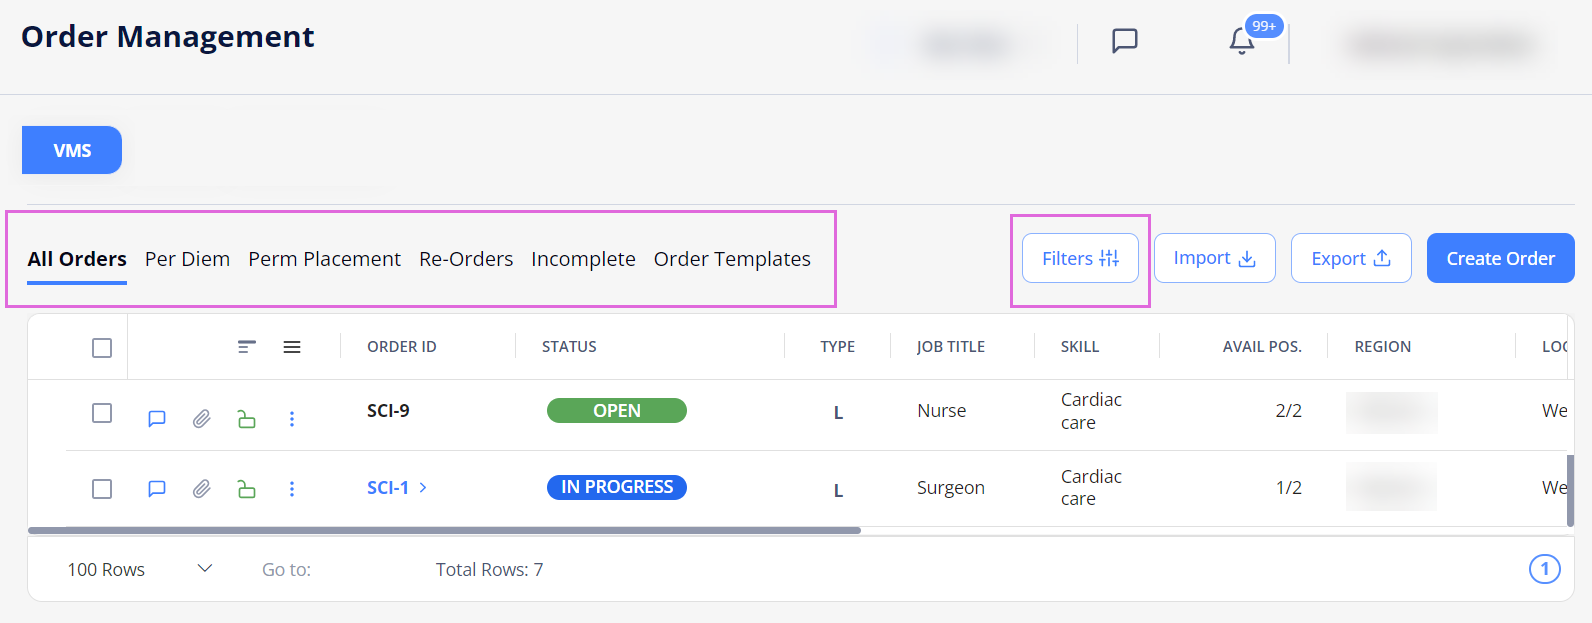
- To narrow down your selection, apply Filters that will be preserved on this specific page.
Note the following filters:- To view the Closed orders, in Filters > Order Status, select Closed. Hide the imageSee the image.
By default, Closed orders are not shown on Order Management.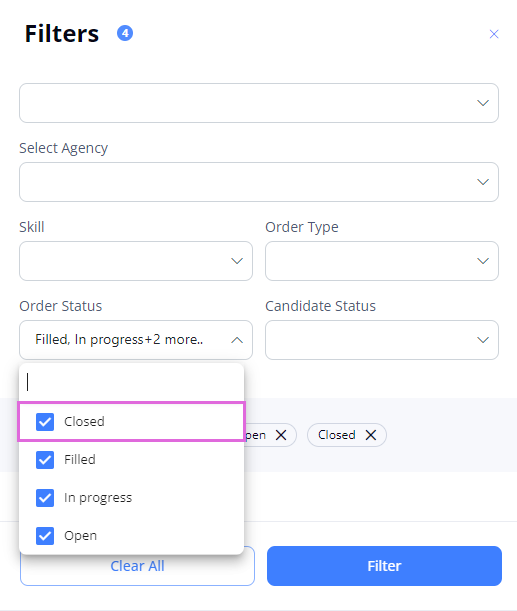
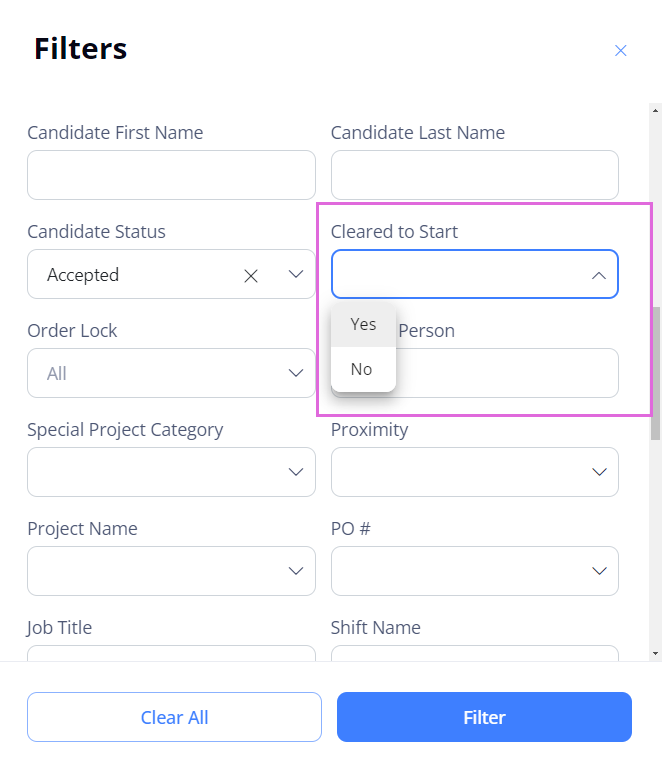
- To view the LTA and Contract to Perm positions with Candidates who are cleared to start the onboarding, in Filters > Cleared to Start, select Yes (if this option is enabled for your Organization). Hide the imageSee the image.
- To view the Closed orders, in Filters > Order Status, select Closed. Hide the imageSee the image.
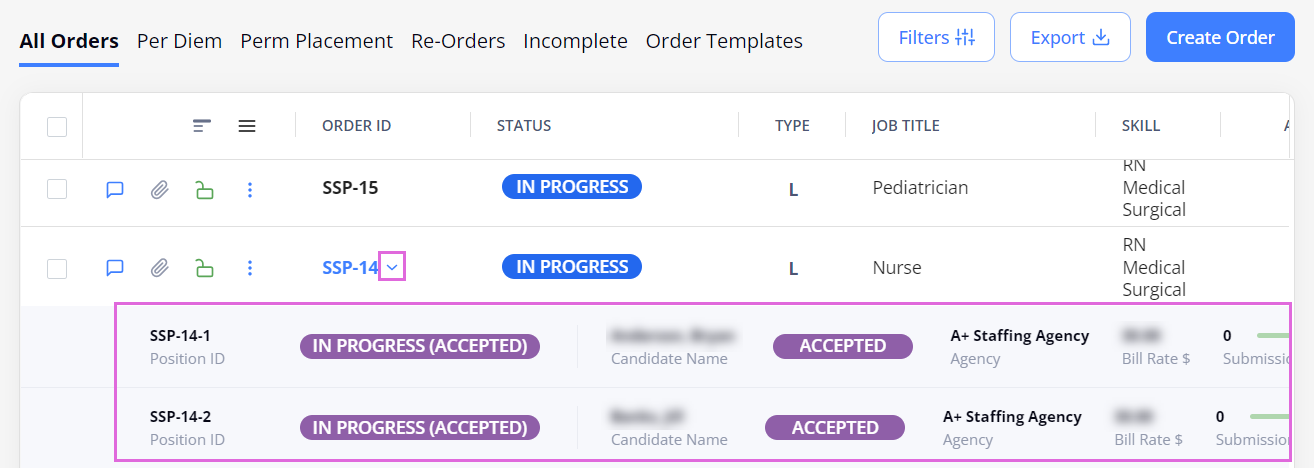
- To view the order positions (which appear after a Candidate accepts the offer) or re-orders (for Open Per Diem), expand the order by using the arrow
 next to its ID. Hide the imageSee the image.

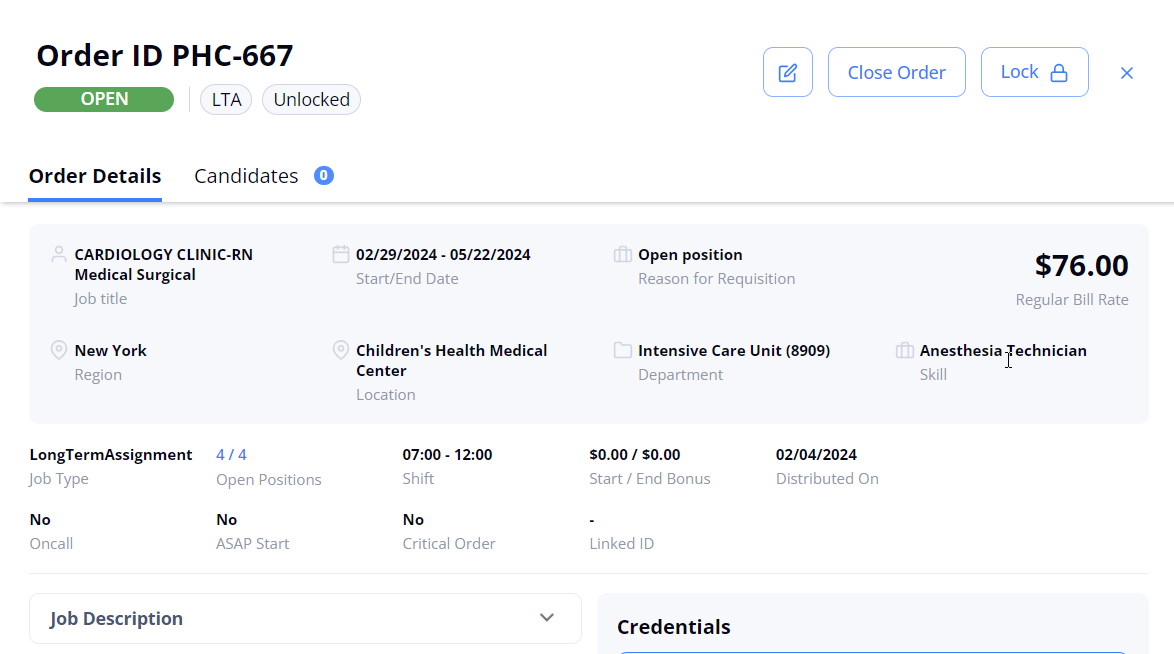
- To view the order or position details, select the needed one in the grid to open the details sidebar on the right. Hide the imageSee the image.
- The order position is created on Order Management (as a secondary level of the primary order) only after at least one Candidate has accepted the job offer for a corresponding order.
Create orders
You can create orders in the following ways:
- To create a new order, select Create Order in the upper right and provide the required information in the corresponding sections. You can also use the Quick Order button on Dashboard to quickly create an order with only basic required data. For details, go to Create order.
- To create an order from the existing template or finish an incomplete order, go to the Incomplete or Order Templates tab correspondingly (Hide the imageSee the image.) For details, go to Create order from template.
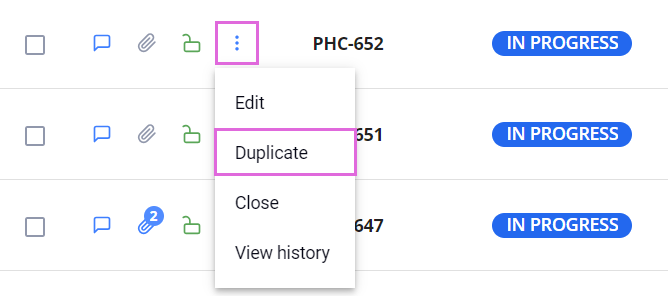
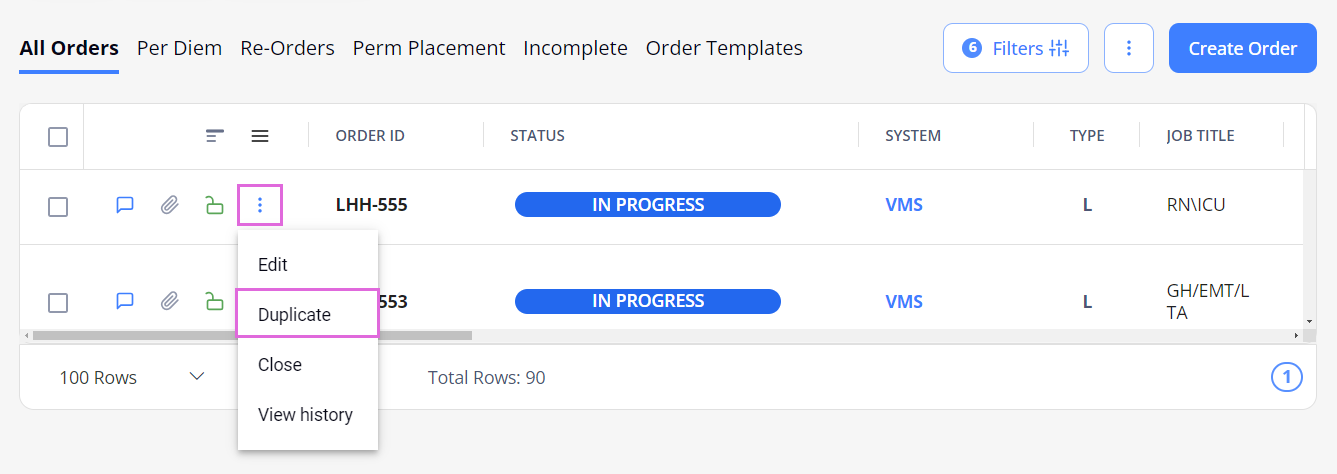
- To quickly create an order similar to the existing one, select the needed order and choose Duplicate from the order dropdown menu
 in the grid. Hide the imageSee the image.
Create re-orders
You can create re-orders (one-day shifts) from the Open Per Diem orders (if you have the proper permission.) With re-orders, you can quickly select Candidates for urgent shifts from the pool of already approved and onboarded Candidates or release the re-order to all Candidates to fill based on availability. For details about creating a re-order, go to Re-order (Open Per Diem).
- Open Per Diem orders are always Open until they are closed manually. For details, see Close order or position.
Edit orders/ re-orders
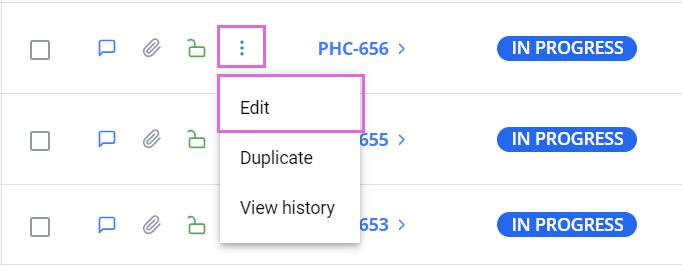
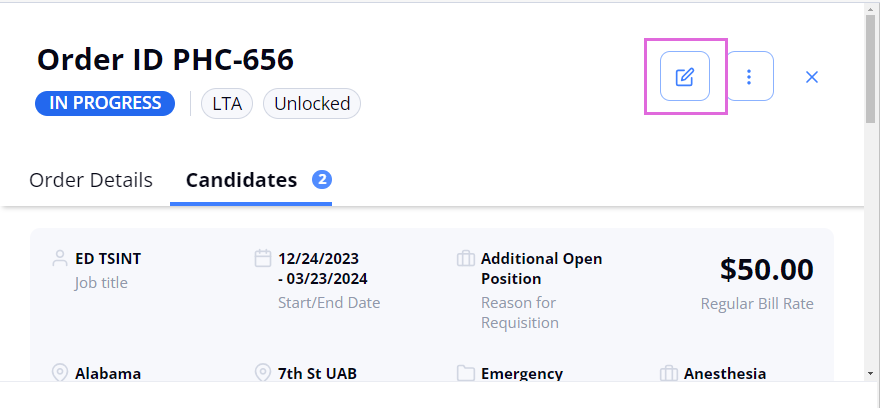
To edit an order/re-order, select the ![]() icon in the order/re-order details sidebar or pick this option from the order dropdown menu
icon in the order/re-order details sidebar or pick this option from the order dropdown menu ![]() in the grid. Hide the imageSee the image.
in the grid. Hide the imageSee the image.
|
|
As long as the order is in the Open status and no Candidates are applied to it, you can edit all its details.
- Editing the Region, Location, Department, or Skills fields in Open orders may affect the data previously defined for this order. Make sure that the Credentials and Bill Rates data is correct.
After the order moves to further statuses (In Progress or Filled ), you can still edit some of its details, except for the Region, Location, Department, and Skills data.
Duplicate orders
To duplicate an order, select the Duplicate option from the order dropdown menu ![]() in the grid. Hide the imageSee the image. After this, a new order with the same details opens in the edit mode, where you can make the needed changes (or not) and submit the order.
in the grid. Hide the imageSee the image. After this, a new order with the same details opens in the edit mode, where you can make the needed changes (or not) and submit the order.
- You may use the Duplicate option only if you have the proper permission.
Delete Incomplete orders
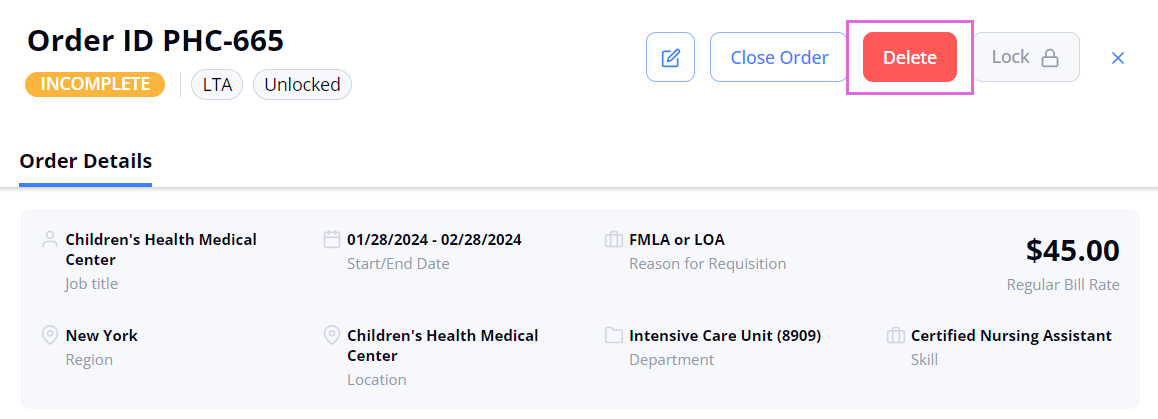
You can delete Incomplete orders by using the Delete button in the order details sidebar. Hide the imageSee the image.
After the deletion, the order gets the Deleted status. To view the Deleted orders and their details, on the Incomplete tab > Filters, turn on the Show Deleted Orders toggle. Hide the imageSee the image.
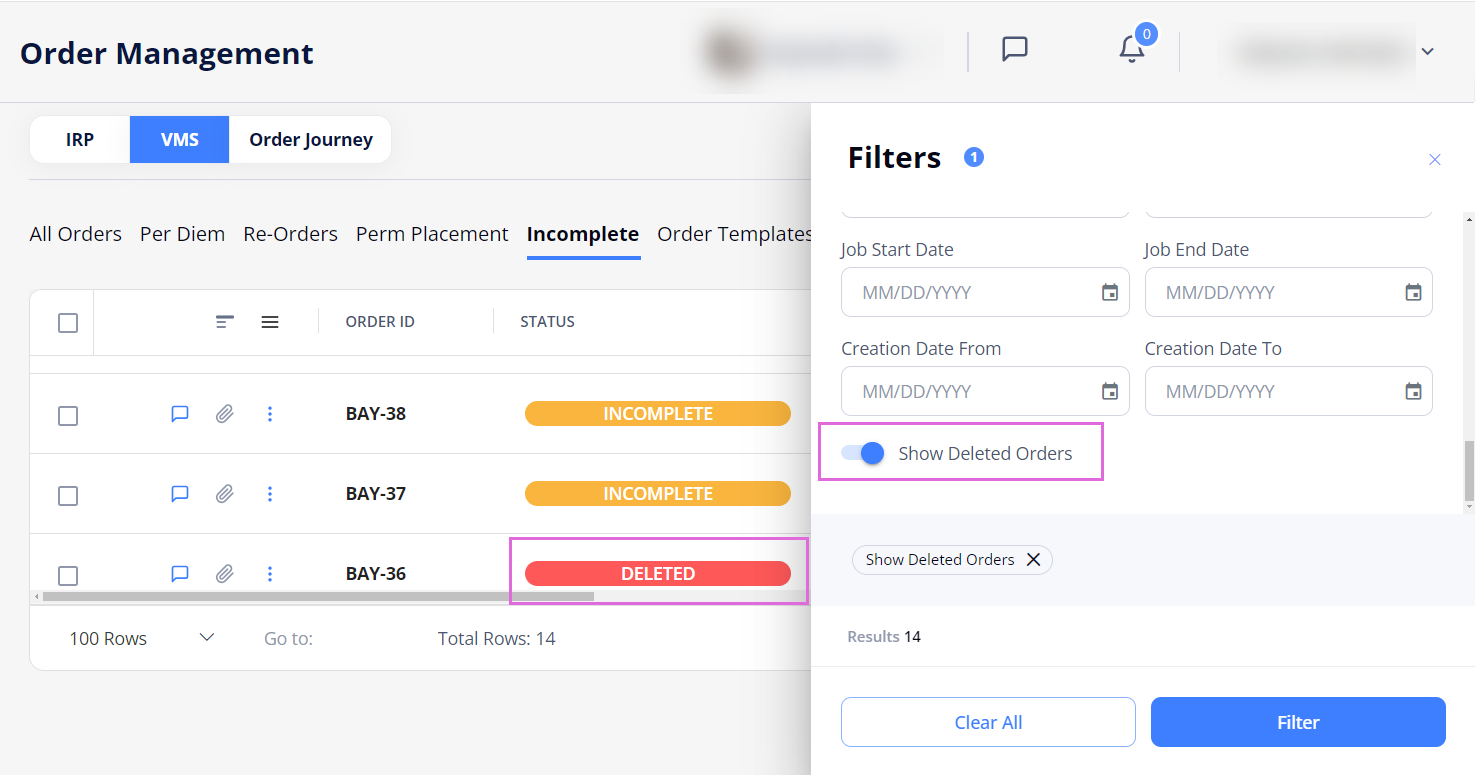
- By default, the Deleted orders are hidden
You may not edit or duplicate the Deleted orders. You can only view their audit history by selecting the View history option from the order dropdown menu ![]() . Hide the imageSee the image.
. Hide the imageSee the image.

Comment on orders
You can add the following types of comments on Order Management when creating or editing orders, in order details, and Candidate's details within an order:
- Internal
 comments: visible only to your Organization's internal users;
 - External
 comments: visible to both your Organization's internal users and the partnership Agencies' users.
To add a comment:
- In the Comments section of the corresponding screen, type the needed comment.
- Mark the comment as internal
 or external
  by selecting the corresponding visibility icon beside the comment.
- The default comment visibility depends on your Organization's configuration, which you can change manually.
- Send the comment by using the send
 icon. Hide the imageSee the image.
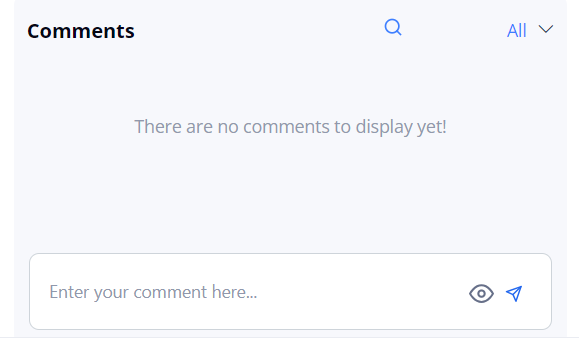
When viewing the comments, you can filter them by using the options in the dropdown menu (All, Internal, or External.)
View and download attached files
In the Order Management grid, the blue ![]() (clip) icon next to an order indicates a certain number of files attached to this order. Hide the imageSee the image.
(clip) icon next to an order indicates a certain number of files attached to this order. Hide the imageSee the image.

To view and download the attachments, select the order to open its details sidebar and check the Files section listing all the attachments. Hide the imageSee the image.
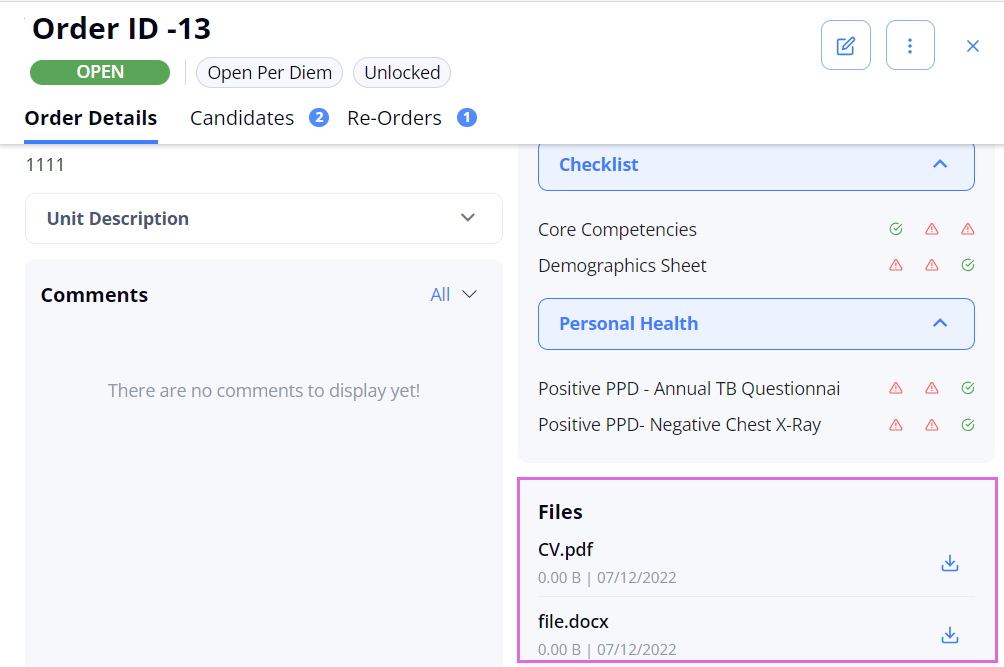
The grey ![]() (clip) icon indicates that there are no attachments for an order.
(clip) icon indicates that there are no attachments for an order.
Add position extensions
You can extend the Filled and Closed positions of LTA and Contract to Perm orders if you want to prolong cooperation with the corresponding Candidates. For details, go to Add position extension.
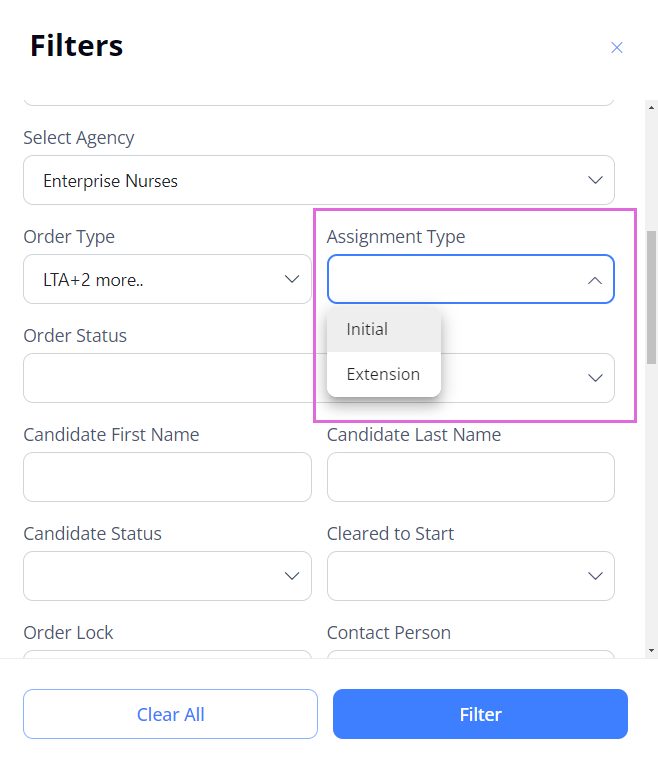
To view only initial or extension orders, in Filters > Assignment Type, select the needed option. Hide the imageSee the image
Close orders
By default, all orders (including the extended ones) and re-orders are closed automatically the next day after all the associated positions achieve their Actual End Date and become Closed.
If you need to close an Open Per Diem order or any other order earlier, you can do it manually before at least one Candidate is accepted. When closed, you cannot edit the order or apply Candidates to it anymore.
- By default, Closed orders are not shown on Order Management. To view them, in Filters > Order Status, select Closed. Hide the imageSee the image.

For details about automatic and manual order and position closure, go to Close and re-open order/position.
Lock orders
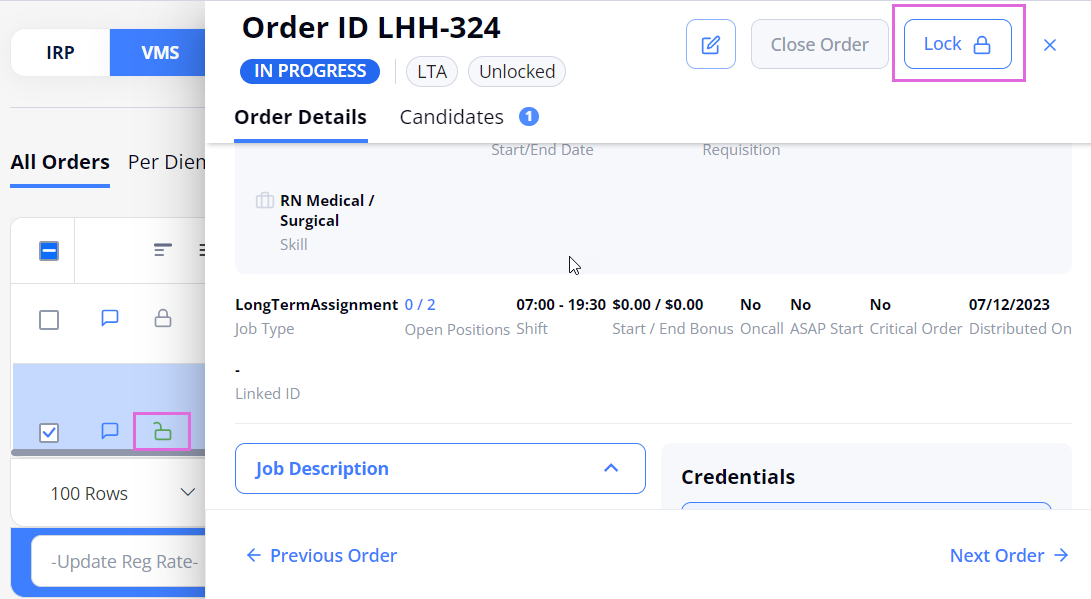
To manually lock an order, so Agencies cannot apply Candidates to it anymore, select Lock in the order details view or the lock icon ![]() next to the order ID in the grid. Hide the imageSee the image.
next to the order ID in the grid. Hide the imageSee the image.
- If all the order's positions are in the Offered/Accepted/Onboard/Cancelled statuses, then the order is locked automatically. It can be unlocked automatically based on the changes in the positions' statuses.
- When the Auto Lock Order When Employees Applied setting is enabled, the system automatically locks the distributed order on the VMS side once the number of applied employees matches the required positions. If the number of matched employees falls below the required count, the order is unlocked.
You can unlock the order whenever needed by using the same options. An exception is a position extension which is locked automatically and cannot be unlocked. For more details, go to Add position extension.
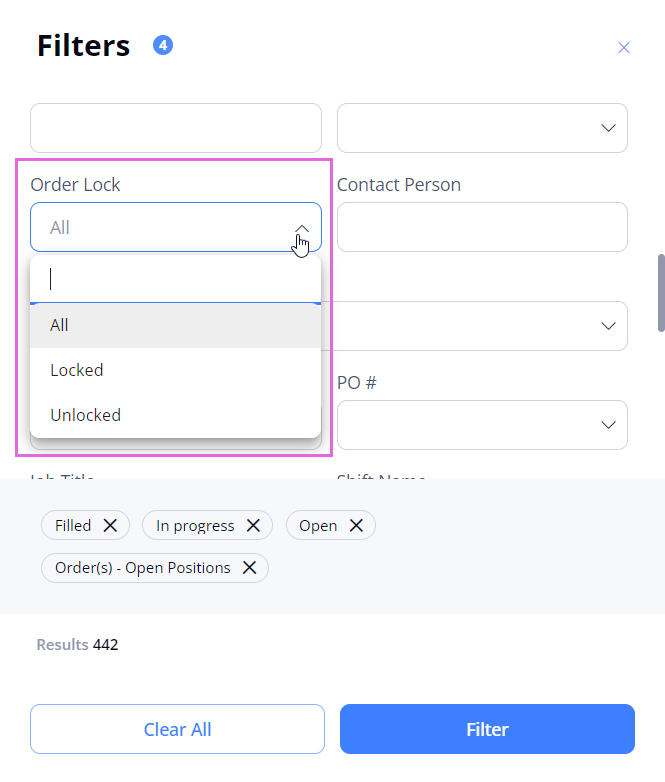
To view the needed locked/unlocked orders, on Order Management > Filters, use the Order Lock filter. Hide the imageSee the image.
View order audit history
To view the order's audit history, select the View history option from the order dropdown menu ![]() in the grid. Hide the imageSee the image.
in the grid. Hide the imageSee the image.

Import orders
To import multiple orders at a time from an Excel file into Einstein II VMS, select Import in the upper right of the Order Management page and follow the instructions in Import orders.
Export orders
To export details about orders from any grid or after applying filters, select Export in the upper right of the Order Management page and choose the needed format (Hide the imageSee the image.) You can also export specific orders by choosing them in the grid using checkboxes and selecting Export.

By default, all the columns in the grid are exported. By selecting the Custom option, you can change the document title and choose which columns you want to export from the grid.
- You may export orders only if you have the proper permission.
View order journey
- This functionality is available only if your Organization is configured to use both the VMS and IRP systems.
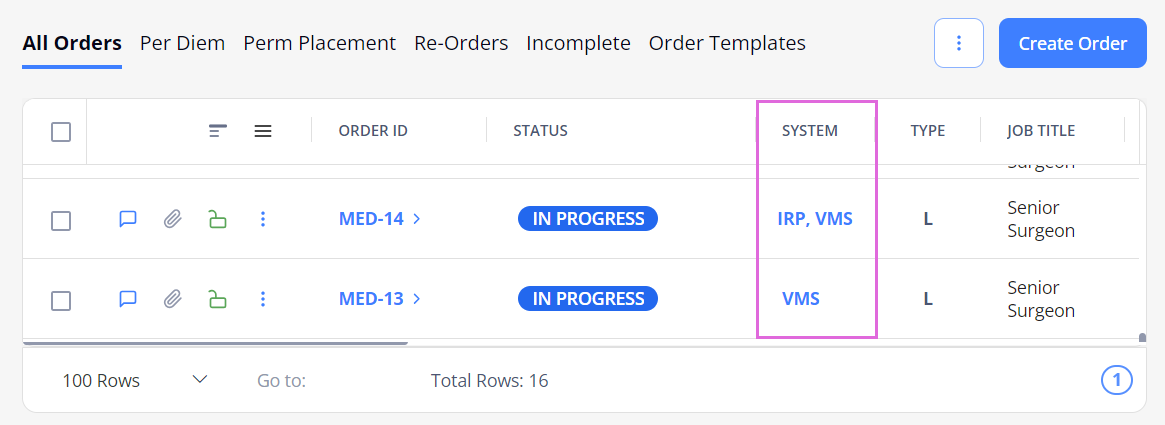
You can see in which system(s) (VMS/IRP/both) the order is published by checking the System column on All Orders and Re-Orders tabs (Hide the imageSee the image). Select the IRP/VMS link to open the order details in the corresponding system (if you have the proper permission).
Also, you can see the IRP or VMS indicator next to the corresponding position which points to the system from where a Candidate/Employee was accepted/onboarded to this position (Hide the imageSee the image).

In addition, on the Order Journey tab, you can view the information about the orders' publishing and distribution (Hide the imageSee the image). Here, you can see the details of all orders that you may access depending on your permissions.
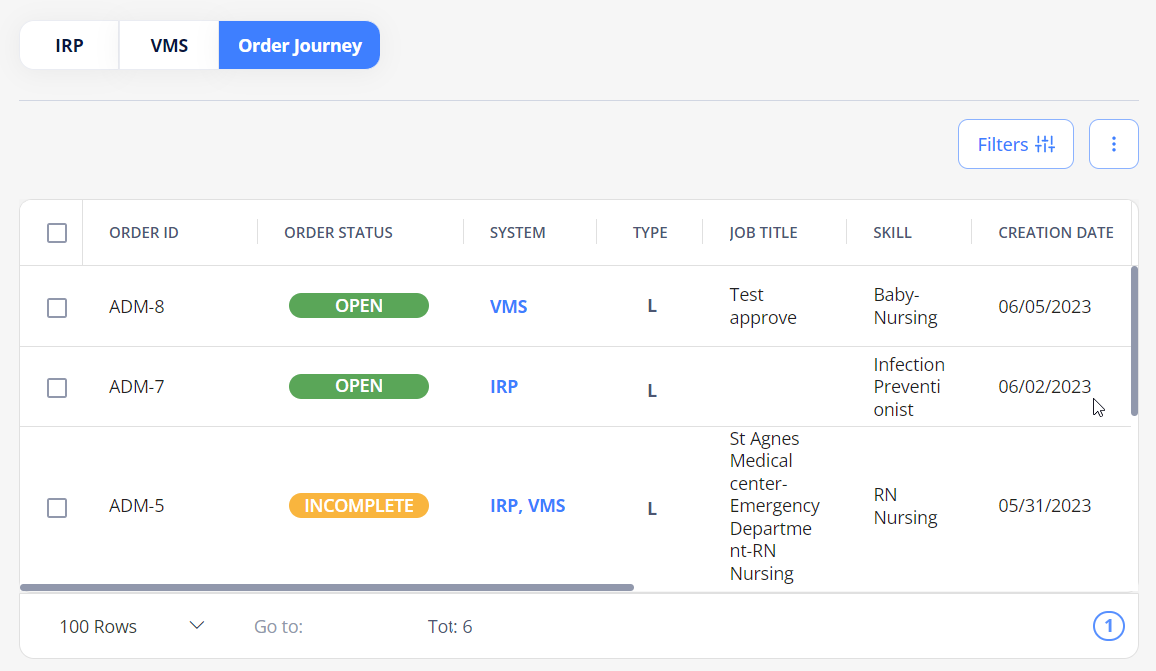
- The Order Status column on the Order Journey tab displays the more advanced status of an order if it has different statuses in IRP and VMS.
Filter orders by the system
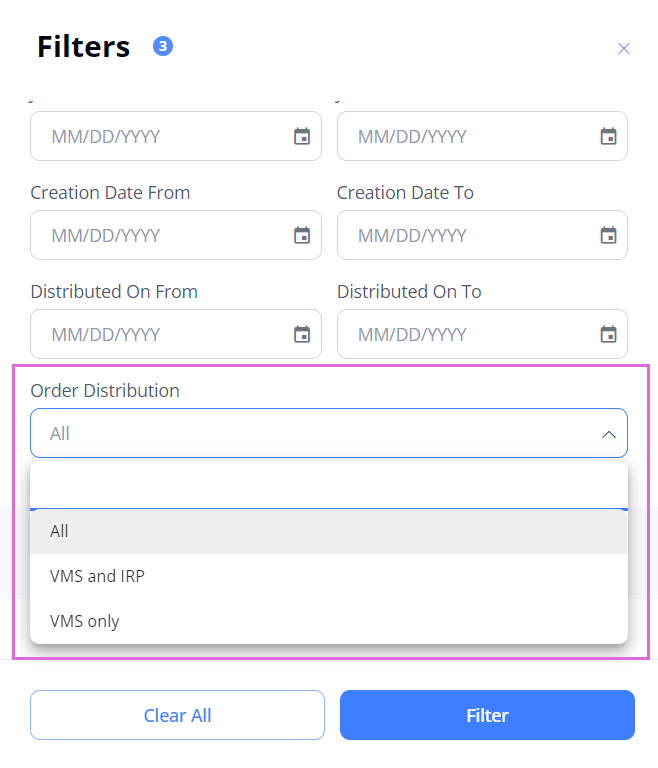
On the All Orders and Re-Orders tabs, you can filter orders by the system where they are distributed. For this, in Filters, use the Order Distribution dropdown menu (Hide the imageSee the image).
Shift Coverage
On the Order Management grid, expand the order to view each position's Shift Coverage percentage and the total number of shifts covered (See the imageSee the image). You can also view the same details in the Candidate list section from the order's sidebar.

- These details will be available only when the Locum configuration is enabled and the order is created with a Locum skill category.
Total Shift Coverage
Open the Candidates tab from the order's sidebar to view the Total Shift Coverage percentage. By default, it shows the percentage based on all candidates.
You can select the checkboxes next to the required candidates and then select the Total Shift Coverage button to view the total shift coverage percentage for the selected candidates. See the imageSee the image.

- These details will be available only when the Locum configuration is enabled and the order is created with a Locum skill category.
Watch video