Group Notifications
On Group Notifications, use the following functionality on the corresponding tabs:
- On Email History, view and send group emails to your Organization's Internal Users, Candidate Users, and associated Agency Users.
- On SMS History, view and send group SMS messages to your Organization's Internal Users, Candidate Users, and associated Agency Users.
- On Email Template, create, edit, and delete group email templates to be reused for your convenience.
- You may send group emails and SMS messages and create/manage email templates only if you have the proper permissions.
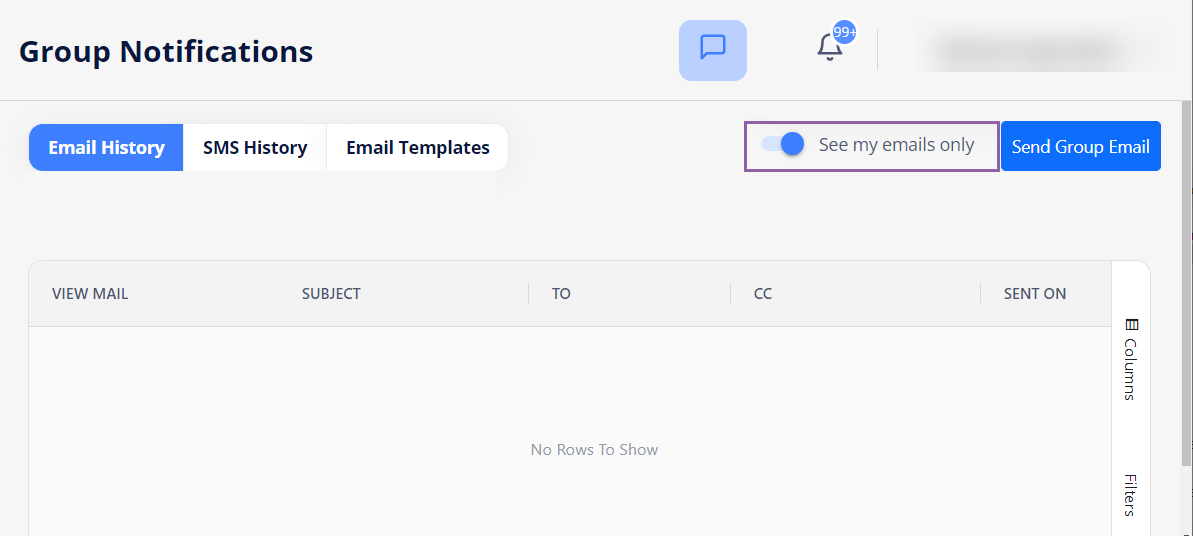
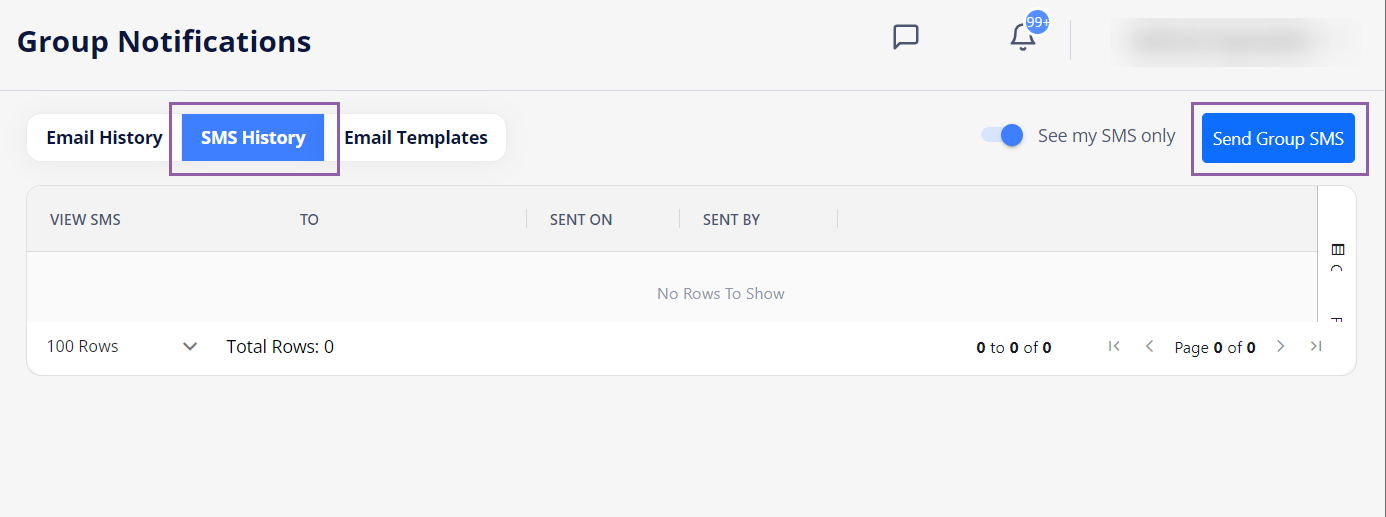
By default, the Email History and SMS History grids display only the emails and text messages sent by you. To view the emails sent by other users of your Organization, turn OFF the See my emails only/See my SMS only toggles above the corresponding grids. Hide the imageSee the image.
- If you do not have the proper permissions configured, these toggles are not available for you.
Send group email
To send a group email:
- Go to Communication > Group Notifications.
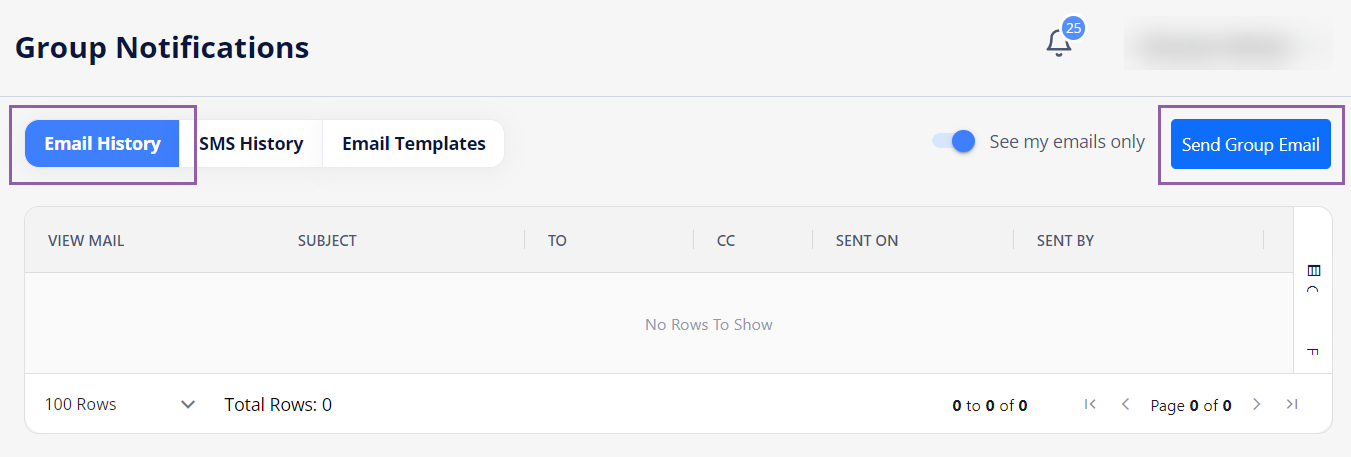
- On the Email History tab, select Send Group Email. Hide the imageSee the image.
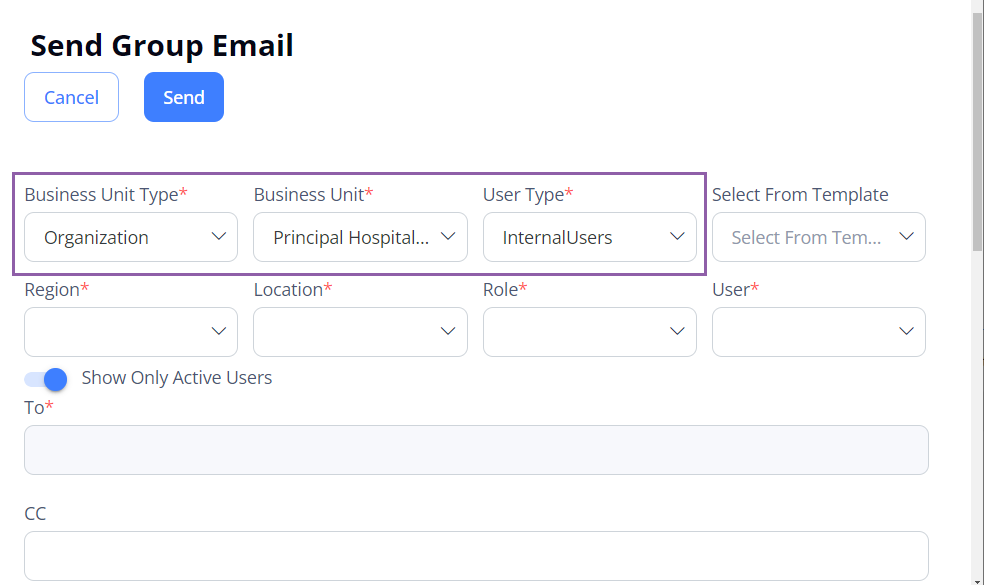
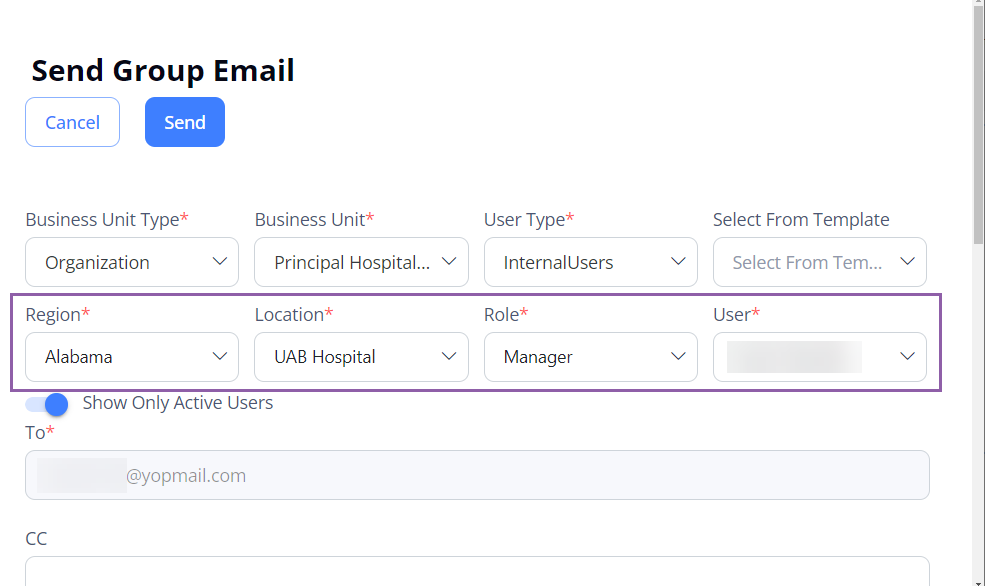
- In the Send Group Email sidebar, from the corresponding fields, select the Business Unit Type (Organization/Agency), Business Unit name, and the User Type (Internal Users/Candidates/Employees (if using IRP)/Agency Users) to whom you want to send an email. Hide the imageSee the image.
- (Optional) From the Select from Template field, pick the desired email template to reuse (if any is available).
- To add an email template, see Create email templates.
- After selecting the user type, in the corresponding fields, provide other required (*) and optional information to specify the recipient(s). Hide the imageSee the image.
- The fields differ depending on the selected user type.
After selecting one or more users from the User/Candidate/Employee fields, the To field is automatically populated with the recipients. Hide the imageSee the image.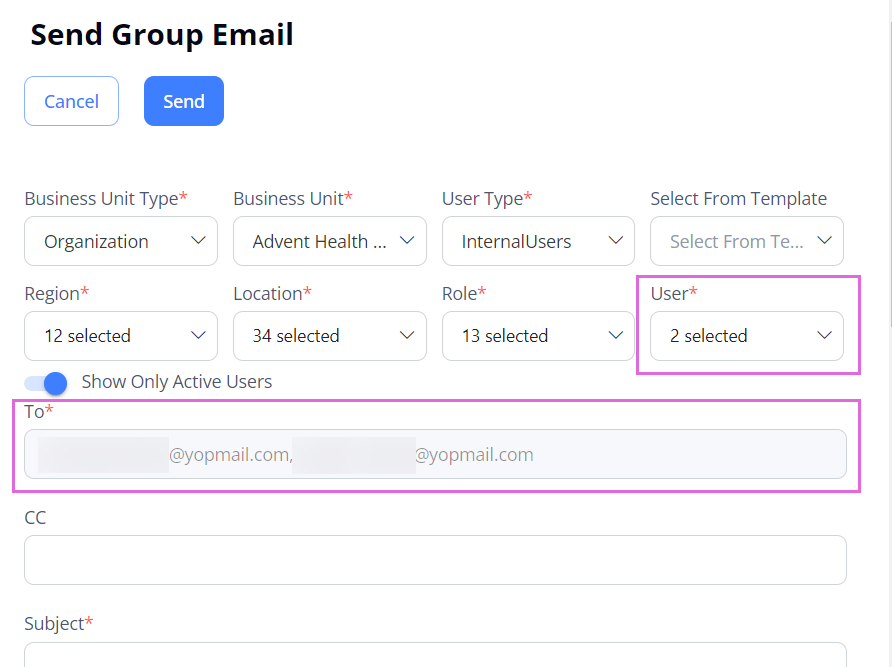
- The fields differ depending on the selected user type.
- In the Subject field, provide the email subject.
- In the Mail Body field, enter and format your email text.
- (Optional) Upload the needed attachments (if you have the proper permission).
- Select Send to send the email to the specified recipient(s).
After this, you can view the details of your sent email in the grid.
Send group SMS
To send a group SMS message
- Go to Communication > Group Notifications.
- On the SMS History tab, select Send Group SMS. Hide the imageSee the image.
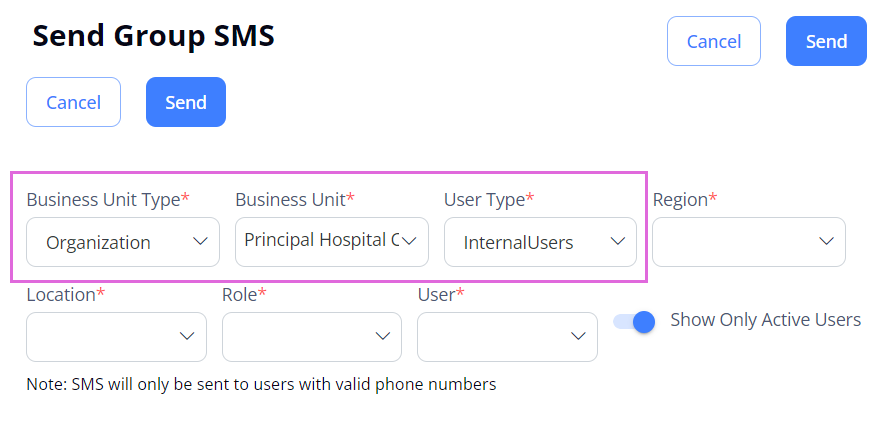
- In the Send Group SMS sidebar, from the corresponding fields, select the Business Unit Type (Organization/Agency), Business Unit name, and the User Type (Internal Users/Candidates/Employees (if using IRP)/Agency Users) to whom you want to send an SMS message. Hide the imageSee the image.
- After selecting the user type, in the corresponding fields, provide other required (*) and optional information to specify the recipients. Hide the imageSee the image.
- The fields differ depending on the selected user type.
- If valid phone numbers are provided for the selected user(s), the To field is automatically populated with the users' names. Otherwise, the text message will not be sent.
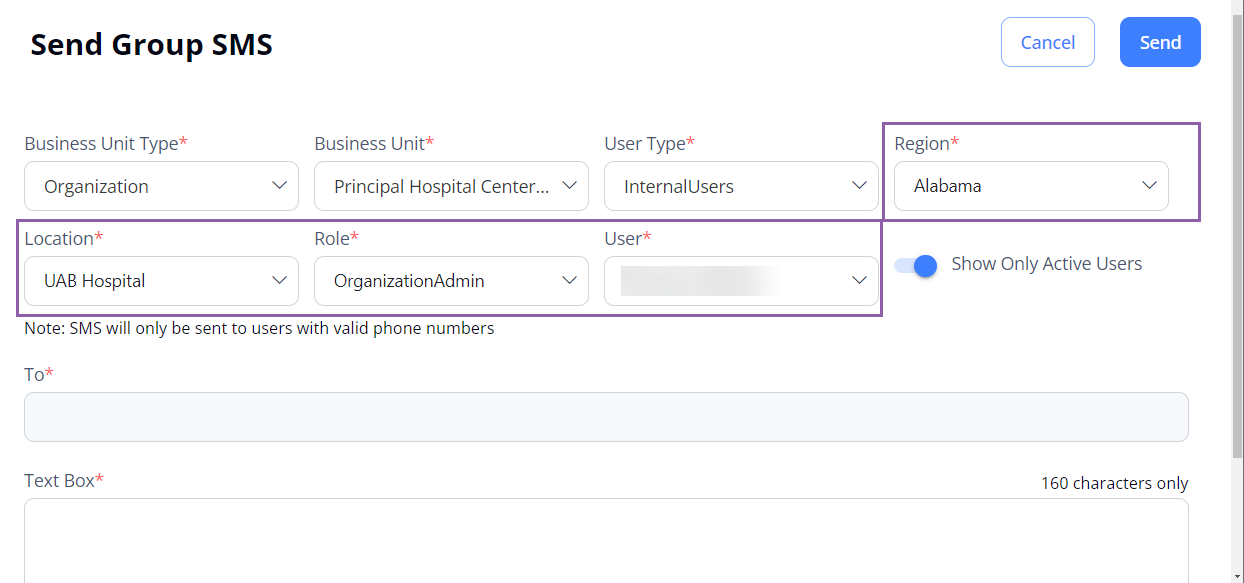
- In the Text Box field, enter your message (up to 160 characters).
- Select Send to send the SMS message to the specified recipient(s).
After this, you can view the details of your sent SMS message in the grid.
Create group email templates
To create an email template:
- Go to Communication > Group Notifications.
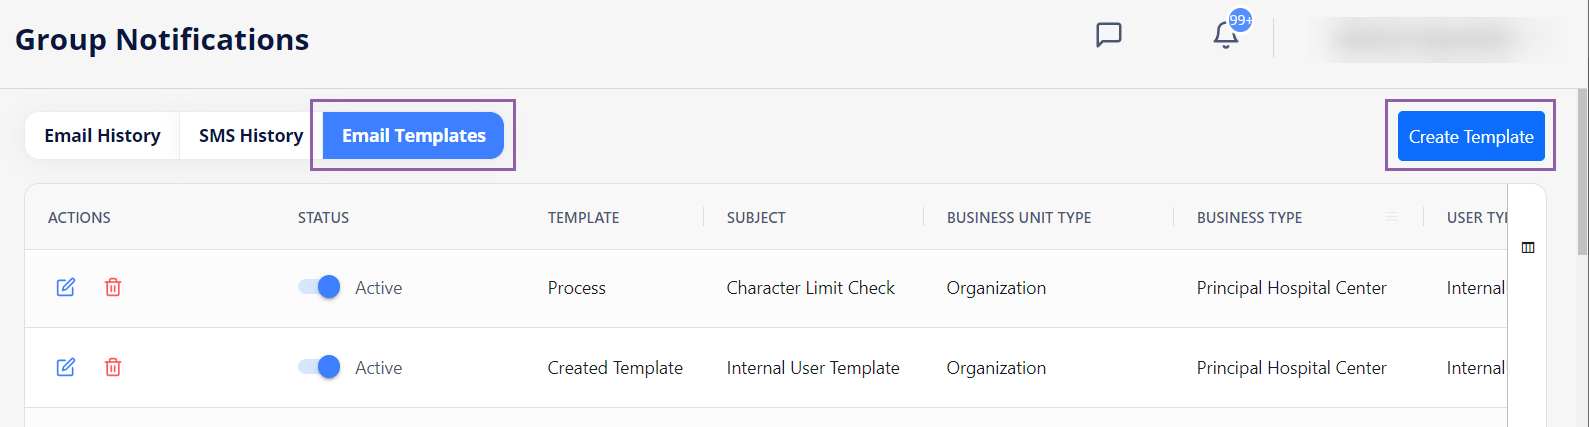
- On the Email Templates tab, select Create Template. Hide the imageSee the image.
- In the Create Template sidebar, from the corresponding fields, select the Business Unit Type (Organization/Agency), Business Unit name, and the User Type (Internal Users/Candidates/Employees (if using IRP)/Agency Users) for whom you want to use this template and specify the Template Name. Hide the imageSee the image.
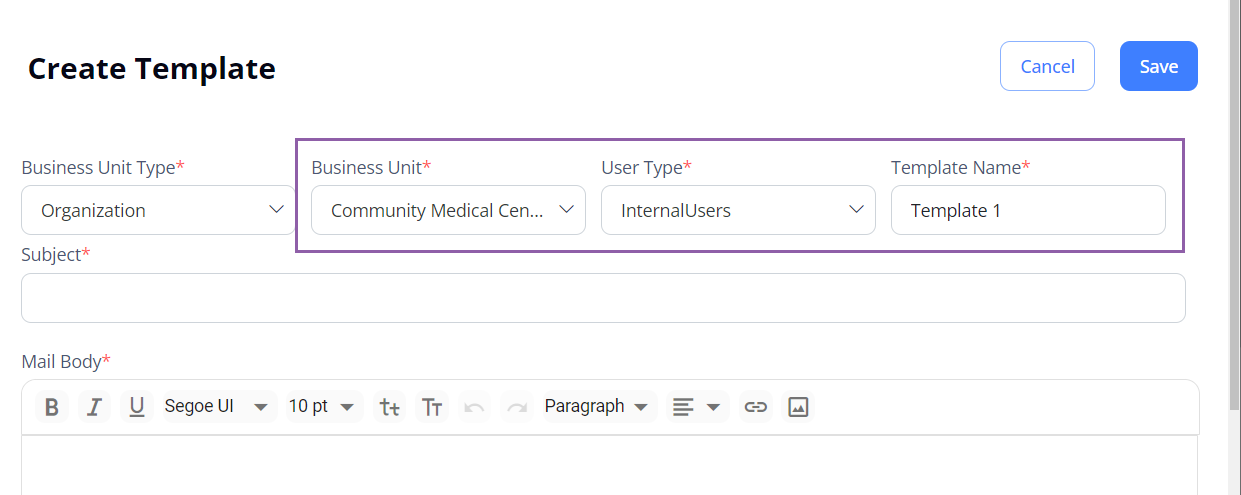
- In the Subject field, provide the subject of your template to be reused.
- In the Mail Body field, enter and format your template text.
- Select Save to save the template.
After this, the created template is available in the grid, and you can select it when sending group email messages to the specified user type(s).
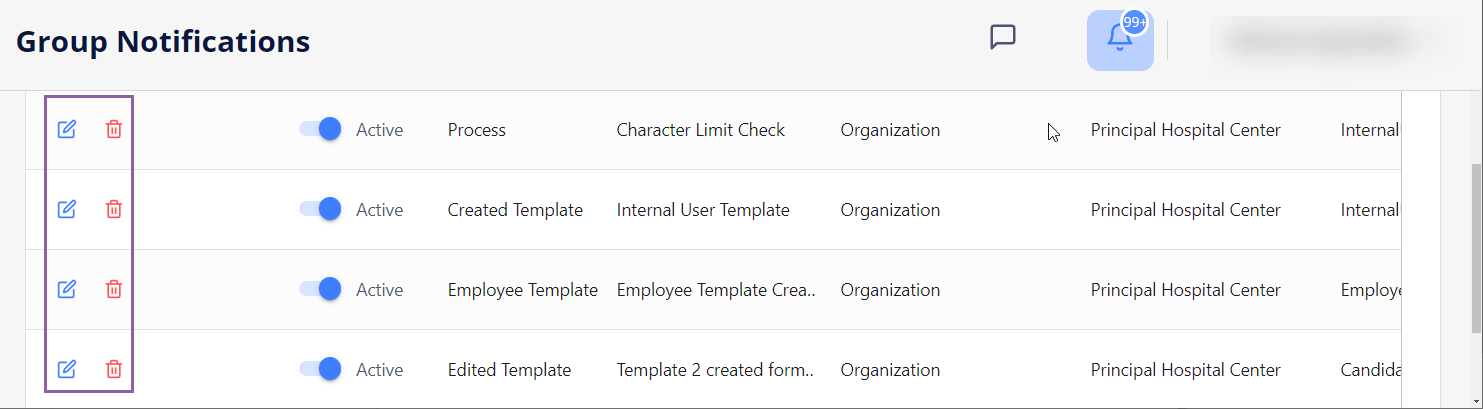
To edit/delete the needed email templates, use the corresponding icons in the grid. Hide the imageSee the image.